M-Puncher Cheat Sheet #1
The Techivation M-Puncher plugin is an easy way to deliver, you guessed it, punchiness to your mixes. While M-Puncher is very intuitive and quick to dial in your sound, there is more to this plugin than might initially meet the eye. In this article, we go through a few tips and tricks in order for you to get the most out of this comprehensive transient shaping plugin.
Thump vs track EQ
M-Puncher and transient shaping in general works by adjusting the level of the attack portion of the audio relative to the rest of it in order to have the transient punch through. Alongside this, you may want to use EQ to help the element cut through from a frequency standpoint as well.
By using an EQ plugin, you end up adjusting the tonal balance of the entire track, which might throw off the parts you don’t want to add punch to. By using the Thump control, you can apply a bass boost to just the attack portion of your audio, leaving the rest of the track completely unchanged, and helping to keep your mix clean and uncluttered.
Pick the best envelope mode
Make sure to experiment with the different envelope modes, as these shape the attack portions of your audio and will greatly impact the overall sound from the M-Puncher. If you are looking for a short, snappy attack then you probably want to go with Tight, but for a longer, open-sounding attack, you’ll want Loose.
To strike a balance between focused punch and openness of the attacks, you can’t go wrong with Normal. If you want to really hear what it’s doing, try turning punchiness all the way up and then adjusting the envelope mode.
Add punch to specific elements in a sample
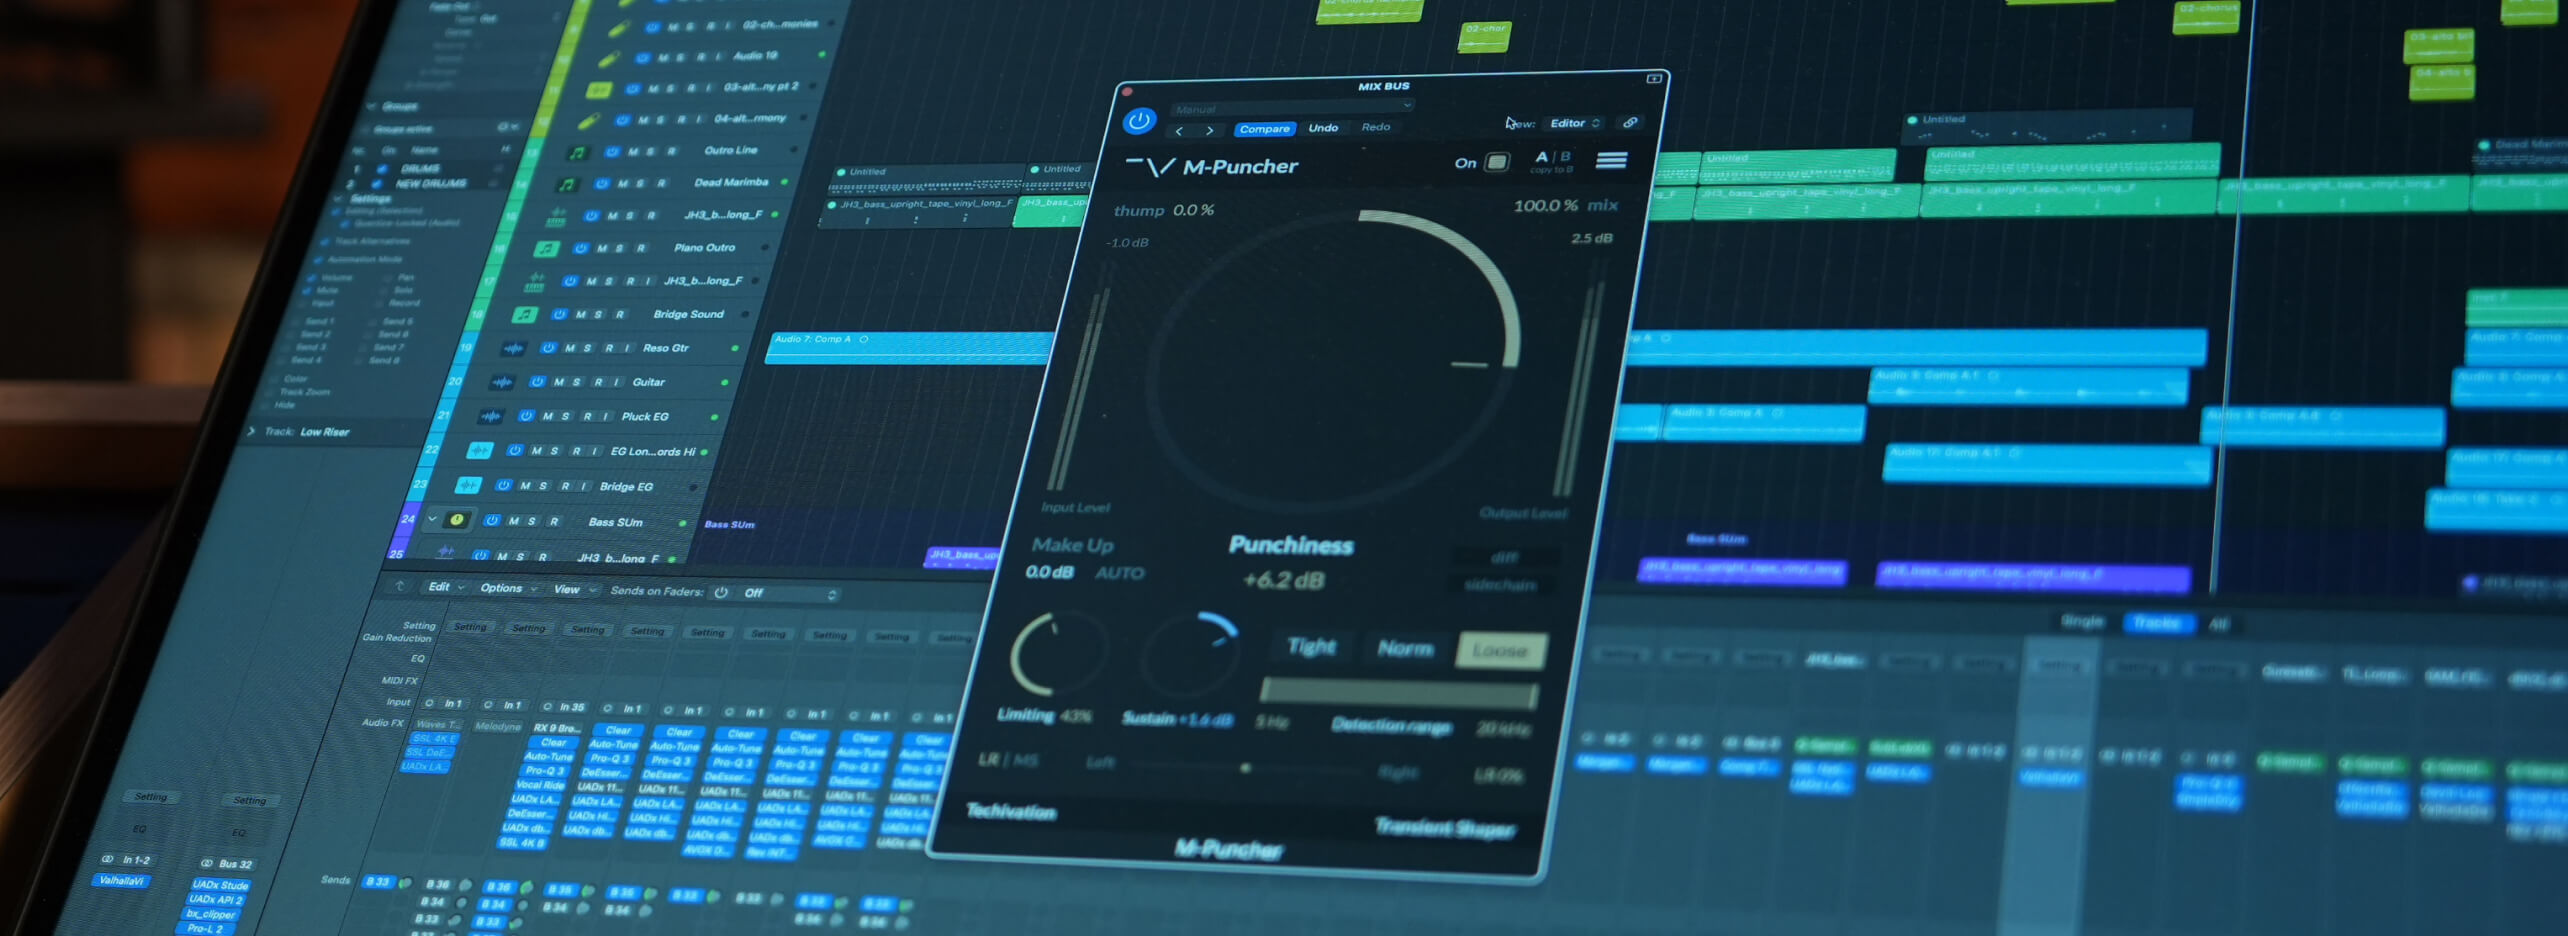
You don’t have to settle with what you're given when working with full drum kit samples. By using the Detection Range setting, you can dial in M-Puncher to add punch to specific elements like the kick or snare. Enable the Sidechain button to listen to just the selected frequency range, then dial it in until you can only hear the element of the kit to which you want to apply the punch.
Now M-Puncher is only triggered when that element is hit! It’s worth noting that this controls the detection of the attack and sustains portions of the audio, but the processing is applied to the whole signal. This ensures that the impact of the attack is never compromised by splitting the audio into multiple bands.
Is it also a softening plugin?!
M-Puncher is incredible at adding punch, but believe it or not, M-Puncher is also great at getting rid of punch. By bringing the Punchiness control down below 0, you can really take the edge off harsh and overly punchy sounds in your mix to help them sit better without needing to spend ages fiddling with compressors and EQ plugins.
All the controls that you would normally use to craft your punch can be used in the same way to soften. For example, the envelope mode works in the same way, with Tight creating a focussed softening of the attack and Loose carving out a greater proportion for an even softer sound.
It’s also a harmonic saturation plugin?!
So M-Puncher makes things hard, makes them soft, and it can also make them warm! The limiting parameter not only helps tame the attack level but also increases the harmonic richness of your attacks as well. This even works when you are using M-Puncher to soften attacks as well, so you can use high-limiting settings to apply subtle saturation to your softened attacks.
Use Auto Gain when making adjustments
The Auto Gain feature as part of the Make Up Gain control can be incredibly useful when adjusting M-Puncher’s parameters and listening in isolation or as part of your mix. When enabled, it continuously and automatically applies the appropriate amount of make-up gain to ensure the track’s level is the same as it was before.
This makes it much easier to really hear what the plugin is doing to shape your sound, without any overall level changes throwing off your judgement. Just make sure you turn it off once you are done adjusting parameters to fix the make-up gain value.
Sustain is a powerful creative tool
A potentially overlooked tool is the Sustain control. Other than the Punchiness control, this is probably the next control that can have the most impact on shaping your sound. While the Punchiness control affects the level of the attack portion of your audio, sustain controls the rest!
So by reducing the sustain, the audio will decay faster to give a much shorter and focussed sound, perfect to really emphasise the punch. By increasing the sustain, however, you can start playing with the ambience of the audio, bringing out the tail end of snare hits for example.
Bonus Tip: Have a play with automation
As a bonus tip to getting some really creative results, why not try automating some of the M-Puncher parameters to give more of a unique sound to your tracks. Perhaps increase the Punchiness over the course of a pre-chorus to lift the energy going into the Chorus. Or why not try automating the sustain of your snare to dramatically bring up the ambience on key beats. Think outside the box and come up with some creative ways of giving your track some unique flair using M-Puncher!
As you can see, M-Puncher is a powerful tool, capable of so much more than just “adding punch” to your mix. If you want to try M-Puncher for yourself, you can grab a 14-day free trial from the M-Puncher product page. Hurry over there now and give it a go!
Written By Harry Lewis
Share this Article
Featured in this post
![M-EQ Review By Czar [Video]](https://cdn.sanity.io/images/9uzzx98j/production/341fd252af5cfdce3815b27290e6ccf6b1185b98-1280x720.jpg)