Transparent Correction: How to Widen Your Mix Without Phasing Issues
Making a mix sound “Wide” is easy... But making it “Wide that still hits in mono, survives club PAs, and doesn’t turn hollow on phones” is the real challenge. Most widening failures come from one of these patterns: you widened the wrong content such as low fundamentals, lead vocal body, snare centre, or anything that must remain stable. You created width with time or phase tricks that don’t translate, so the mix feels huge in stereo but collapses into comb-filtering, blur, or a strange inside-out tonality in mono. You widened before you corrected, meaning harshness, mud, or imbalance already in the stereo field gets multiplied by the widening process.
The clean way to do it is a two-stage system. First, correct with precision and control using M-EQ. Second, widen only where it’s safe and musically beneficial using M-Imager. Third, re-balance the Side tone after widening with a second, light M-EQ pass if needed. That workflow is what “transparent correction” actually means: the listener perceives a wider, cleaner, more expensive master without hearing the processing.
Why M-EQ Is the Right First Stage (Correction Without a Surgical UI)
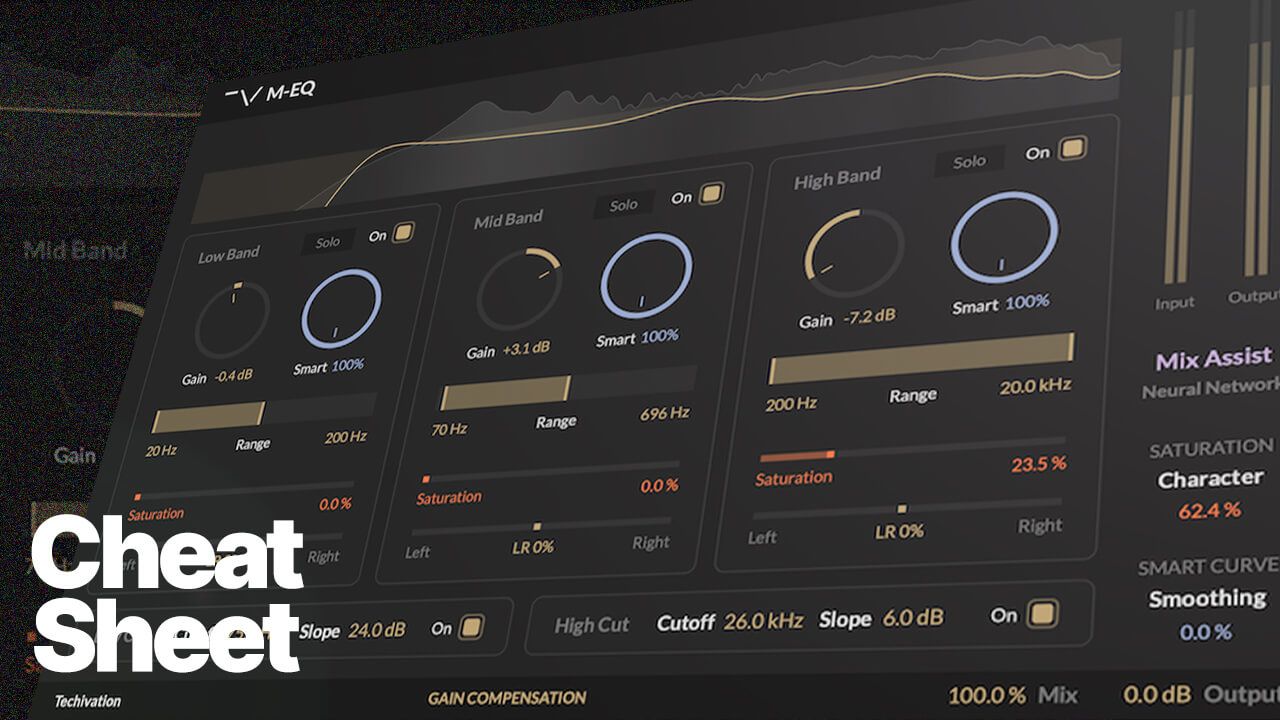
M-EQ’s advantage in mastering isn’t that it has EQ bands. It’s how the bands behave.
1) Range-First: You Constrain the Footprint Before You Move Gain
Traditional parametric EQ forces a slow loop of frequency hunting, Q tweaking, gain adjustment, then re-adjusting Q because gain changed the perceived bandwidth. M-EQ flips the order: you pick the band as a musical region, set the range to frame the zone, then apply gain. The engine handles high-resolution shaping inside that boundary. In mastering terms, this lets you make decisive moves without accidentally shifting neighbouring energy. This matters because widening is extremely sensitive to tonal spillage. If your correction is messy, widening makes that mess louder and more obvious.
2) Smart Curves: Dynamic Spectral Correction Without Chasing Automation
A master rarely needs purely static EQ. Harshness can be transient-dependent, low-mid bloom can be note-dependent, and presence can poke only when the chorus hits. M-EQ’s Smart Curves are built for this reality. You choose the band and range, set your gain intent, and Smart dynamically redistributes the correction based on the incoming signal. The result is less over-correction, less tonal pumping, and more stability, especially once you increase width.
Mastering-safe mindset: use Smart aggressively on cuts when the problem is intermittent, use it more conservatively on boosts, and remember that subtle Smart plus subtle gain usually beats a big static curve.
3) Saturation per Band: Density Where You Choose It
Engineers often reach for top-end EQ when they actually want perceived detail. The trap is that EQ can get sharp before it gets exciting. M-EQ’s per-band saturation adds a second axis: harmonic density inside the selected range rather than a global layer of distortion. In mastering, this can be the difference between boosting air and getting brittle versus adding air and making the master feel expensive. Range-first behaviour keeps this safe by localising the harmonic life exactly where you want it.
4) Mid/Side Mode: Lock the Anchor Before You Chase Width
If you plan to widen later, think in Mid/Side early. The Mid is the anchor: vocal, snare, bass fundamentals, punch. The Side is spaciousness, ambience, stereo instruments, perceived size. M-EQ lets you correct in Mid/Side so the centre stays solid. This is the foundation of widening without phase problems: you protect what must not move.
Why M-Imager Widens Without the Usual Phasey Artefacts
M-Imager’s strength isn’t a single widen knob. It treats widening as a controlled, frequency-limited, mono-aware process.
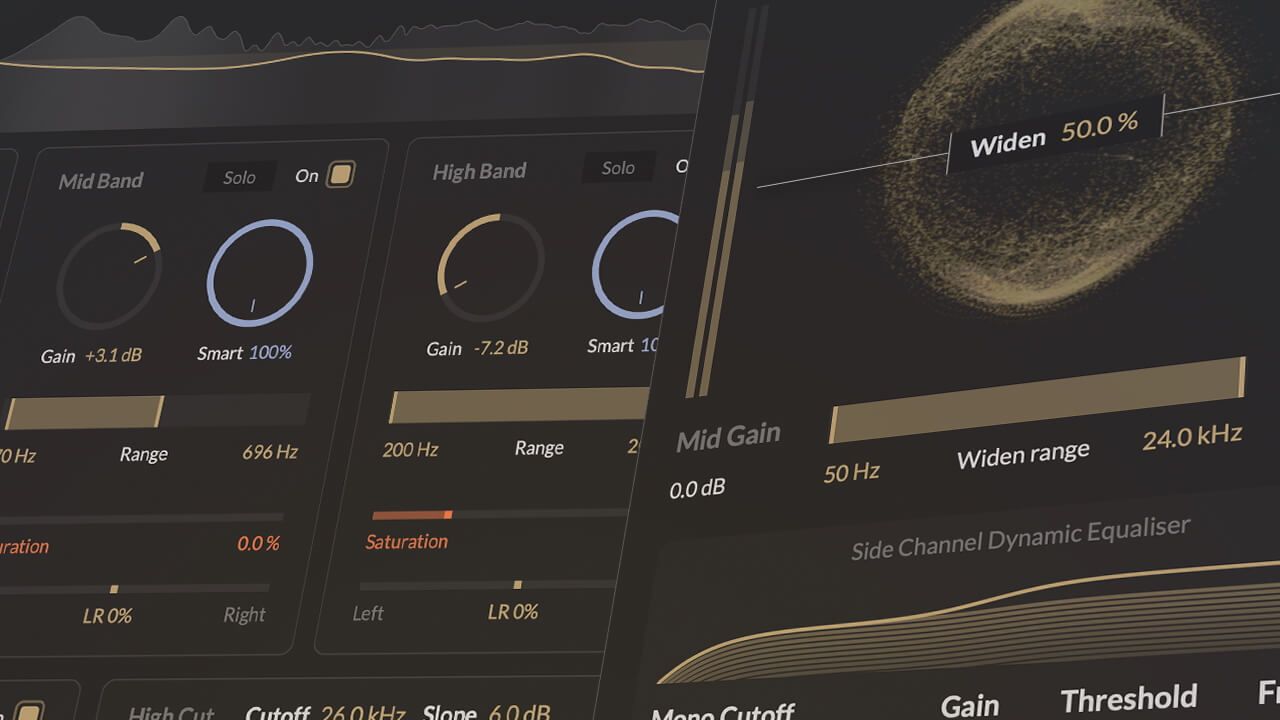
1) Widening Range (Min/Max): Widen Only Where It Pays Off
Not all frequencies should be widened. Low frequencies are where mono compatibility and punch are won or lost. With Min and Max Widen Frequency, widening becomes a targeted decision. Widen upper lows or low mids too much and the mix gets big but weak. Widen upper mids and highs appropriately and you get openness without destabilising punch. One rule that prevents most widening failures is to raise the Min frequency before increasing Widen intensity.
2) Mono Cutoff: A Guardrail for Low-End Stability
Mono Cutoff reduces Side contribution below a chosen frequency so the master keeps its foundation. Kick and bass fundamentals stay centred, the groove remains solid in mono, and low-end cancellation risk is reduced on imperfect playback systems. This is transparent widening in practice: width on top, authority down low.
3) Side Shelf With Threshold-Based Dynamics
A static side shelf can exaggerate ambience, cymbal wash, or phasey behaviour in quiet sections. M-Imager’s side shelf includes a threshold so the effect behaves dynamically. The mix doesn’t get wider and brighter all the time, only when the signal supports it. This keeps width from turning into constant stereo haze.
4) Spectral Method With Bounded Micro-Time Behaviour
Classic wideners often rely on delays or all-pass tricks that create strong stereo perception but unpredictable mono results. M-Imager works in the spectral domain with controlled phase behaviour across frequency and time. Widening is band-limited, time-smoothed so it doesn’t swim, and internally bounded so it doesn’t drift into obvious artefacts. The result is a bigger image that still feels like the same mix, just upgraded.
The Combined Workflow: Transparent Correction in Practice
The goal is not more processing, but the right processing in the right order.
Stage 1: M-EQ (Pre-Widen Correction)
Enable gain compensation so A/B comparisons stay honest. Work range-first across three mastering zones: low band for foundation control with tiny moves, mid band for clarity versus congestion with strict range discipline, and high band for openness versus brittleness using small gain and optional light saturation. Use Smart Curves where the mix is dynamic, such as harsh choruses or intermittent low-mid bloom. If you already plan to widen, switch to Mid/Side early, keep Mid moves minimal and protective, and let Side handle more cleanup. This reduces the need to force width later.
Stage 2: M-Imager (Controlled Widening)
Set Mono Cutoff first to stabilise the low end. Define the widening range conservatively, keeping fundamentals out of the process. Increase Widen slowly until the field opens while the centre remains solid and mono stays intact. If it gets wide but hollow, raise Min Widen Frequency, increase Mono Cutoff, or tame Side brightness dynamics. Use the dynamic side shelf sparingly so choruses expand without turning verses into fog. Check Mid and Side monitoring to confirm the Mid still carries the record and the Side isn’t cluttered or overly aggressive.
Stage 3: M-EQ (Post-Widen Re-Balance)
After widening, address what was revealed rather than what was created. Insert a second M-EQ in Mid/Side mode and make micro moves. Tidy Side sharpness or cloudiness with small cuts or gentle high shaping. Avoid big Mid changes to protect punch and vocal focus. This final pass is the secret to transparency. The listener should never think “widening plugin.” They should think “premium master.”
The One Principle That Prevents Phasing Issues
Correct first with M-EQ, widen selectively with guardrails using M-Imager, then re-balance Side tone with M-EQ. When you follow that order, you’re not widening chaos. You’re widening a controlled, curated version of the mix. That’s why the master stays powerful, stable, and mono-safe while still feeling wider than it should.
![M-EQ Review By Czar [Video]](https://cdn.sanity.io/images/9uzzx98j/production/341fd252af5cfdce3815b27290e6ccf6b1185b98-1280x720.jpg)