
DIY Tips & Tricks for Home Music Studios
Introduction
These tips and tricks are dedicated to aspiring producers/engineers looking to improve their home music studios. When I started out, from my experience, these different areas are some of the most annoying to deal with. They still haunt me to this day as I’ll be given stems for mixing/mastering and will recognize those same problem areas I used to deal with within the recordings. Taking the time to rectify these problems will make it a smoother transaction for all parties involved. Especially in this day and age, most artists are their own mixing & mastering engineers too, so, you’d only be making your own life a misery.
Understanding Your Room
So, it’s not hard to tell if an instrument (especially a vocal) was recorded poorly. You don’t need to be a seasoned professional to recognize that. Everything from a decent condenser microphone, gain staging, pop shield, microphone stand, and having a silent environment to record within could have been taken into consideration, but still, the recording still sounds dissonant. Why? There could be more factors involved, however, one of the offenders, often overlooked, is the room you’re recording within.
There are genuine equations/methodologies out there that are great for getting the best out of your space. However, a good start would be to simply listen to your room before incorporating anything into the workspace. Clapping your hands, snapping your fingers, and listening to how it responds within the room’s environment. As an experiment, having one shot instruments on a continuous loop, something with a variety of elements like a kick, snare, toms, and cymbals hits alternating between each element of the drum kit every 4 bars (or one hit every 2nd bar to allow yourself time to process the impact of each instrument). You could even try having them with/without processing to really spices things up.
Listen to how your room responds to each hit and try pinpointing frequencies loitering within the space. Then start incorporating new pieces of treatment. Some of the best pieces of treatment are unconventional. Meaning the use of furniture, carpet, blankets, bookshelves, and heavy-duty curtains. Listening before, during, and after to fully grasp if it’s making a difference. Even recording it for future reference. This might sound longwinded but you’re killing two birds with one stone. Achieving an optimum listening environment while training you for future studio sessions. By training, I mean, if this is what you want to do with your life, professionally, you will encounter sessions where you’ll have to listen to
the same thing (from a kick, snare to a vocal take) that isn’t exactly pleasing on your ear, over and over and over again. Why not prepare for that? I’ve heard so many aspiring (and professional) producers/engineers complain about having to listen to something continuously as if that wasn’t going to be their job.
My DIY Hacks
I nearly paid over £600 for an acoustic treatment bundle. Then realized I could do it myself for half the price. All materials were sourced from Wickes. You should be able to source the same materials from your local builders’ merchant for in and around the same prices. My purchase included:

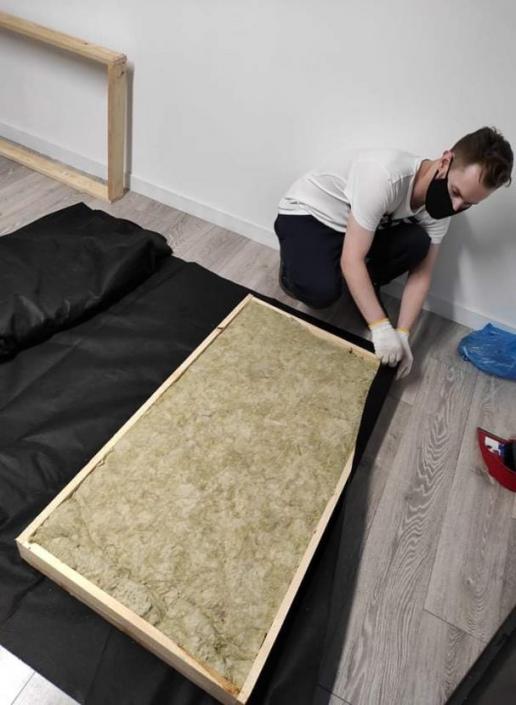
I then sourced black fabric to cover the panels from amazon, totaling around £50. All in all, this cost me just under £300 for all the materials. Resulting in 12 acoustic panels covering the earliest reflection areas in my room and wherever was appropriate. Instead of nearly paying £600 plus for a bundle of smaller (in length, width, and quantity) acoustic panels. Subsequently, this then treated the room I had way more accurately than the more expensive bundle would have! Seeing your own work paying off and being put to good use is also a great feeling.
Be sure to position some panels at the earliest reflection points. In other words, the first point of contact that your speaker output will hit in your space. Otherwise, this will introduce what’s known as comb filtering. This is the combination of the direct speaker output and nearby surfaces, ultimately smearing the transparency of the sound you’re hearing. Another problem area, is the corners of a room. They are renowned for getting congested with bass frequencies.

Rectify this by “trapping” those low-end frequencies with bass traps. To assist with this, allow for breathing space behind the panels and the wall you’re propping it up against. This can help strengthen the overall absorption of low-end frequencies lurking within your room.
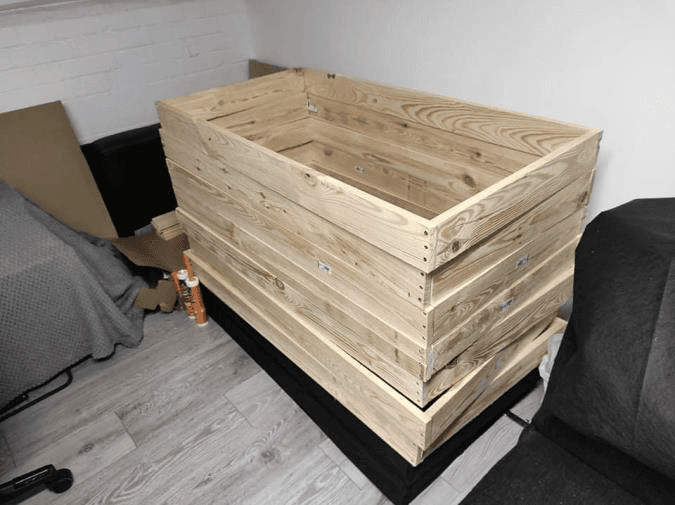
Vocal booths are easily priced within the thousands of pounds. Obviously way out of my budget when I first started. I thought of many different ways to build my own vocal booth and had a genius idea to buy a garden shed. They are fairly inexpensive and there’s essentially no pre-production required, it’s ready for installation upon delivery. You’d just need to ensure it’s a comfortable size for both the artist and you. Depending on the size, the foundation isn’t too far from a traditional vocal booth you’d pay 10x more for (my shed was around the £250 range).
Once built, I then insulated it and put additional treatment inside the booth. I also cut some extra wood I had leftover and built shelves for decorations like plants and LED candles. I then wrapped the outside of the booth with the same fabric that I used on the acoustic panels and that was it. It sounded great, a nice dead environment that had a bit of character. Alternatively, build your own booth from scratch. This allows for complete creative control but will mean you have to do your own pre-production measuring up, and installation procedures. However, if cheaper than the garden shed alternative, why not? If you have to steal one of those old red telephone booths, then so be it… for legal reasons, I’m joking! What I’m trying to say is, to think outside the box. If you have the budget and space, I’d recommend sectioning off a portion of the room and completing isolating two areas. So, for example, having 3 quarters of the room dedicated to a control room and the remaining quarter to the live room/booth.
Should you fix it in post?
The short answer, if possible, NO. Fix what you can at the source. One of the most irritating misconceptions is thinking things can be easily fixed in the mix. While I think it’s incredible that anybody can now record a hit single from their bedrooms, we can’t ignore the fact that a professional’s touch is often required and/or overlooked. I agree with experimenting, 100%, but understanding where problem areas are and the necessary corrections that need to be applied in order to fix them is crucial, however, at the same time, it’s all subjective. By this, I mean, incorrect use of gain staging, pops and clicks being present, and incorrect tuning, just to name a few. Obviously, some of these things are bound to happen regardless, like mouth clicks and pops. However, they’re easily removed using postproduction tools.
Another big offender that I have to deal with when being sent stems for mixing is sibilance! It can be somewhat controlled but is dependent on the source you’re recording, how they’re genetically wired, and the microphone you’re using. An effective way to assist with reducing sibilance at the source, position your microphone at a 45-degree angle towards the performer. Another helper, which can be combined with the above techniques if needed, simply A-Bing different microphones. Some microphones have a frequency response focused around the mid/high-mid frequency ranges. This is something often unknown when beginner musicians/artists/singer-songwriters buy microphones. On the flip side, there isn’t necessarily the luxury of demoing different microphones before purchasing, however, if you can, I’d highly recommend it. Even booking studio time with the sole purpose to demo a variety of affordable microphones so you can find the one your voice suits best.
There’s plenty of variables working with and against you and you won’t eliminate the offending frequencies entirely, nor should you, but reducing it as much as possible is the goal. If your physical attempts at reducing any sibilant issues aren’t working, or enough, a de-esser will assist with that in post. Having multiple processes, like physically trying to resolve the issues in unison with post-production processes (plugins) will work. Sometimes, the bare minimum is required, sometimes, stacks of plugins is the answer – obviously, using multiple stages of a singular process in moderation, none of them should be doing any form of heavy lifting. It just all depends on the source you’re working on.
The digital realm is incredible. Producers and engineers are spoilt for choice with plugins which can be quite overwhelming. However, there’s the luxury of being able to build your whole arsenal with free plugins. For my students, I’m continuously on the hunt to add to a document I’ve produced with links to free plugins that I consider the best for the job. One of those plugins I’ve just added onto the list is Techivation’s <Link href={'/t-de-esser-pro'}>T-De-Esser Pro</Link>. A simplified yet advanced plugin unit. With the advanced units, I love how Techivation’s <Link href={'t-de-esser-pro'} >T-De-Esser Pro</Link> isn’t just a de-esser, it’s a multi-functional machine. The fact that it has so many components doesn’t take away from the fact it’s one of the most natural-sounding de-essers I’ve used. It’s clear every aspect, not only its main purpose of de-essing was given the upmost care and attention. It deserves a spot at the top of the food chain with the other current heavy hitters.

I like experimenting with saturation on most things, especially a vocal, and the fact that this de-esser has it inbuilt within its own mechanics is a godsend. I don’t have to input a separate plugin into my chain, ultimately speeding up my workflow. Adding a distinctive color and texture without any harshness or nasty artifacts. As if this wasn’t enough, Techivation also added in the ability to “filter” the saturation. Allowing you to focus solely on a specific high-frequency range. My two favorite functions are “Mode” and “Link”. Hitting the “Mode” (mid/side option) button allows the user to process stereo tracks’ central and side information individually. Perfect for bringing focus to your desired area of the stereo field on a recording. Hitting the “Link” button allows the user to balance the percentage/depth of processing between the left and right or mid and side channels. In addition, a very simple, yet effective option to have at your disposal is the “mix” control. Perfect for parallel processing.
The T-De-Esser Pro is sleek and easy to grasp. The first time I tried it, it was as if I’d been using it for ages with how easy I grew accustomed to its features. It saves me so much time thanks to its flexibility and additional functions. It’s on every mix I do now, I can’t live without it.

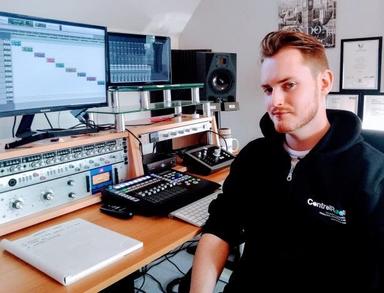
By Studio Manager, Recording/Mixing Engineer, and Educator, Taylor Chambers.


.jpg&w=3840&q=75)